Best Milk Frothers for Home Latte Art (2026): Microfoam Picks That Actually Pour

Most “milk frothers” can make foam. Fewer can make pourable microfoam that behaves like wet paint and supports real latte art. This guide is practical: it separates topping foam from pouring foam, then shows the exact steps that improve any frother’s results — especially budget automatics.
Quick Picks: Best Milk Frothers for Home Latte Art (2026)
These picks cover real home routines: a microfoam-first manual option, an automatic built around latte-style texture, premium consistency, compact convenience, large-batch serving, and a budget “battle” for shoppers comparing entry-level models.
-
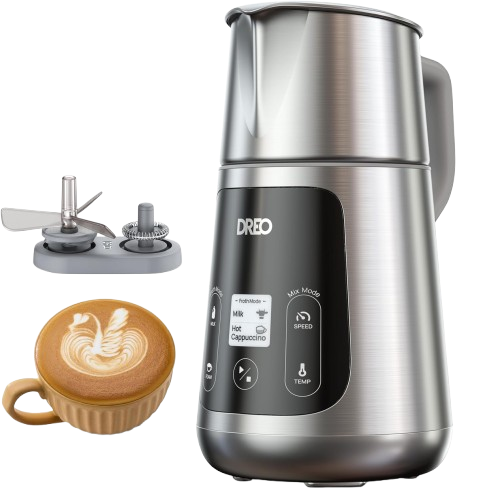
Best Automatic for Latte Art Texture: DREO Automatic Milk Frother (Art-level Microfoam)
↓ Jump to Review -
Best Manual Microfoam (Best Texture per Dollar): Subminimal NanoFoamer (V2)
↓ Jump to Review -
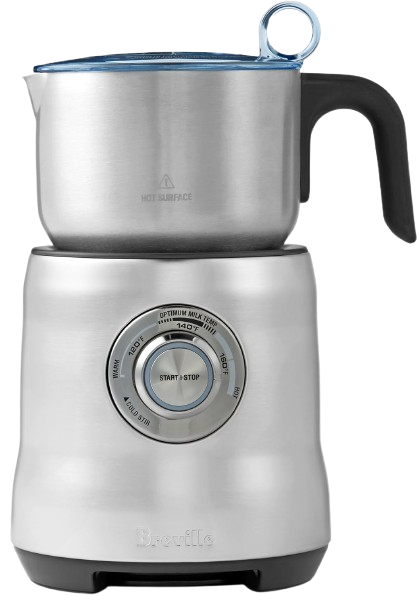
Best Premium Pitcher-Style Frother: Breville Milk Café (BMF600XL)
↓ Jump to Review -
Best Mid-Price Pitcher Frother: Capresso froth PRO
↓ Jump to Review -
Best Compact “Set & Forget” Frother: Nespresso Aeroccino 4
↓ Jump to Review -
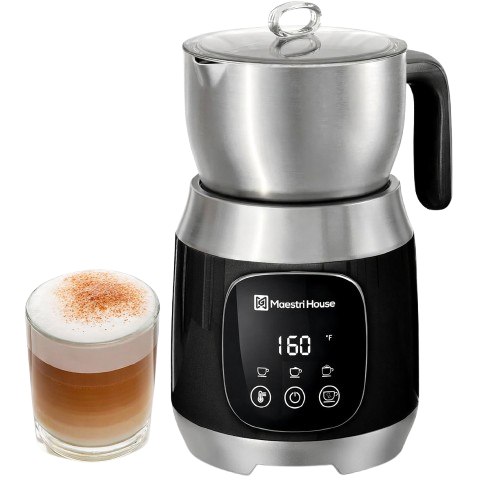
Best for Families / Multiple Drinks: Maestri House DualFro 600
↓ Jump to Review -
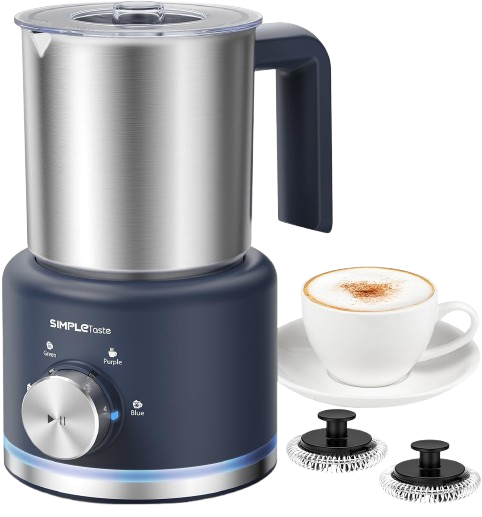
Budget Battle (Entry Level Automatics): SIMPLETASTE vs Rafow vs PSIIDAN
↓ Jump to Comparison
What “latte art foam” actually means
Latte art needs microfoam: fine bubbles fully integrated into hot milk so it looks glossy and flows as one uniform liquid. Dry, tall foam is great for topping cappuccinos, but it tends to sit on top of the drink instead of blending into the crema.
In practice, microfoam behaves like paint: it pours smoothly, you can control its speed, and it stays cohesive long enough to draw shapes. That’s why two frothers can have similar ratings while producing totally different “art” results — one makes a fluffy cap, the other makes pourable milk.
Manual vs automatic frothers: the honest trade-off
If latte art is your main goal, this is the key decision:
- Manual microfoam tools (like the NanoFoamer) can reach excellent texture because you control aeration directly — but you must heat milk separately and learn timing.
- Automatic frothers are easy and consistent for daily milk drinks — but many default to “cappuccino foam” unless you pick a thin/latte mode and polish the milk before pouring.
The best setup for most people is simple: an automatic for convenience or a manual microfoam tool for texture — plus a small latte pitcher to pour from. You can do latte art from an automatic jug, but dedicated pour control matters more than most beginners expect.
The 20–30 second routine that upgrades almost any frother
This is the difference between “foam on top” and “milk that pours”:
- Decant: pour the frothed milk into a small latte pitcher (12oz / 350ml is a sweet spot for single drinks).
- Swirl hard: make the milk spin until it looks glossy and uniform, like melted ice cream.
- Tap: one or two light taps on the counter to pop visible surface bubbles.
- Pour immediately: microfoam separates fast. Waiting 30–60 seconds can ruin definition.
If you only adopt one habit from this article, make it this “polish + pour” routine. It improves premium frothers and rescues budget frothers.
Milk selection: what works best at home
Whole dairy milk is the most forgiving for latte art. It builds stable microfoam and keeps a glossy sheen longer. If you use non-dairy, pick barista blends (especially oat). Standard low-protein plant milks foam, but often break down or pour thin.
Start with cold milk. Overheating is a common home mistake: it hurts sweetness and makes texture collapse. Even without a thermometer, you can use a practical rule: stop when the jug is hot but still touchable for a second or two.
Reviews: best milk frothers for home latte art (2026)
The nine products below are organized to match how people actually shop: premium, mid-range, compact, large-batch, and budget. For each pick, the focus is not “features on the box” — it’s how to get pourable texture with a realistic workflow.
1) Maestri House DualFro 600 — Large-capacity automatic for multiple drinks
DualFro 600 is built for volume. If you regularly make two or more milk drinks per session, big-capacity jug frothers reduce friction: you can heat and foam enough milk in one cycle instead of repeating small batches.
What it’s best at
- Serving multiple drinks: you’re not locked into a tiny single-latte jug.
- Home “café round” routines: two lattes back-to-back without repeating cycles.
- Comfort-first workflow: one-button heating and foam is convenient for shared kitchens.
How to use it for latte art (realistically)
Big jugs are harder to pour from precisely, and overfilling encourages dry foam. The best strategy is to treat DualFro as a froth + heat station, then pour from a smaller pitcher for control.
- Use the thinnest / latte foam option (avoid thick cappuccino foam).
- Froth a smaller amount than the maximum so milk can spin and integrate.
- Decant to a small pitcher → swirl hard → tap once → pour immediately.
Where it compromises
Like most large-capacity automatics, it’s built for volume more than microfoam precision. Expect clean hearts and tulips with good technique, not perfect café rosettas without practice.
2) SIMPLETASTE 4-in-1 Milk Frother — Budget entry with basic modes
SIMPLETASTE is a classic budget pick: a small set of modes, easy daily use, and enough performance for lattes, cappuccinos, and iced drinks. For latte art, it comes down to selecting a wet/thin foam style and polishing the milk.
What it’s best at
- Budget latte routine: warm milk, foam, and cold foam without extra equipment.
- Beginner practice: you can learn pour control without paying for premium appliances.
- Iced drinks: cold foam is forgiving and makes even modest frothers feel “better.”
Example workflow: one latte + simple heart
- Select thin/latte foam (avoid extra-thick cappuccino foam).
- Decant into a small pitcher.
- Swirl until glossy, tap once, pour immediately.
Where it compromises
Budget frothers often inject more air, creating bigger bubbles and a drier cap. You can still do beginner pours, but you’ll rely more on technique and less on “machine magic.”
3) Breville Milk Café (BMF600XL) — Premium automatic with repeatable heating
Breville Milk Café is a premium jug-style frother designed for people who make milk drinks often and want repeatability. The biggest practical advantage in premium milk appliances is not “more foam” — it’s fewer weird batches caused by inconsistent heating and agitation.
What it’s best at
- Daily consistency: fewer surprises if you make milk drinks often.
- Premium feel: a better long-term choice for regular home lattes.
- Latte-friendly output: generally more “wet foam” capable than the cheapest 4-in-1 units.
Latte art routine that works
Don’t pour directly from the frother if you want art. Pour control matters as much as foam texture.
- Choose the wettest/latte-style foam option.
- Decant into a small latte pitcher.
- Swirl until glossy, then pour: integrate high → draw low.
Where it compromises
It costs more and takes more counter space than compact frothers. Like any automatic, you still won’t get a steam-wand replica every time — but you can get clean beginner pours with less fighting.
4) DREO Automatic Milk Frother (Art-level Microfoam) — Best automatic pick for pourable texture
If you want an automatic frother specifically because you want latte-style texture, DREO is the most direct match in this list. The positioning is clear: it focuses on finer, wetter foam rather than a tall dry cap.
What it’s best at
- Latte-art-first automatic foam: better odds of “paint-like” milk vs generic 4-in-1 frothers.
- Beginner-friendly path: less trial-and-error if your goal is pourable texture.
- Cleaner pours: easier to get hearts and tulips with less bubbling.
Example: dialing in one repeatable pour
- Use the microfoam/latte program (avoid thick cappuccino foam).
- Keep fill level modest so milk can move freely and integrate.
- Polish in a pitcher for 10–15 seconds, then pour immediately.
Where it compromises
No automatic is “perfect” across every milk type. Alternative milks vary a lot; you may need to test a barista oat blend and adjust the mode. But among automatics, this is the most aligned to the latte art intent.
5) Capresso froth PRO — Mid-price pitcher frother with a removable jug
Capresso froth PRO sits in the practical middle: it’s more appliance-like than entry-level frothers, without premium pricing. It’s a strong “upgrade tier” for people who make lattes often but don’t want to pay for the top shelf.

What it’s best at
- Daily home lattes: a stable mid-tier option for frequent use.
- Balanced capacity: practical for 1–2 drinks without feeling oversized.
- Pour improvement: decant + polish makes it noticeably more “latte-like.”
How to get cleaner pours from it
- Choose wet/latte foam (not extra thick).
- Swirl longer than you think after decanting — aim for glossy milk, not a fluffy top.
- Start with hearts and tulips; move to rosettas after your flow control is consistent.
Where it compromises
You still won’t get a steam-wand replica with zero effort — but you can get repeatable, pleasant home latte foam with fewer “bad batches” than the cheapest frothers.
6) Nespresso Aeroccino 4 — Compact and fast for everyday milk drinks
Aeroccino 4 is an excellent “weekday” frother: small footprint, quick routine, and easy to live with. It’s great for cappuccino-style drinks and simple lattes. For latte art, treat it as a foam maker and pour from a separate pitcher.
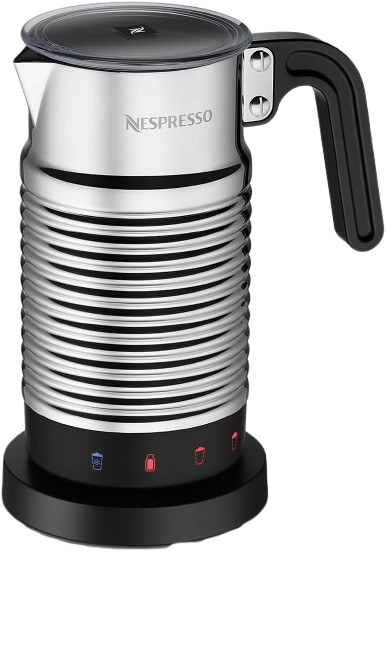
What it’s best at
- Small kitchens: minimal counter footprint.
- Fast routine: great for daily lattes and cappuccinos.
- Reliable foam: especially if you like a thicker top layer.
Latte art tip (the only way it becomes “art-friendly”)
Do not pour directly into the cup. Decant and polish in a latte pitcher, then pour immediately. That one change typically upgrades results more than changing frother models.
Where it compromises
Compact frothers often prioritize foam volume and convenience. You can get good beginner pours, but for consistently clean rosettas you’ll want either a microfoam-first automatic or a manual microfoam tool.
7) Rafow 4-in-1 (B0B6BQPV5Y) — Compact budget pick for single servings
Rafow is a compact 4-in-1 style frother aimed at budget buyers. If you mostly make one drink at a time, smaller jugs can be easier than large-batch models. Latte art is possible when you select a thin foam mode and polish before pouring.
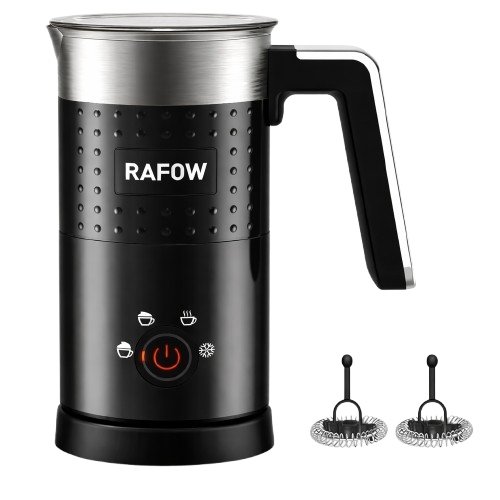
Best use case
- One-drink households: compact size fits a single latte routine.
- Entry-level buying: practice pouring and learn what texture you actually like.
- Iced drinks + cold foam: high satisfaction even with modest foam precision.
How to get the best pours from it
- Pick the thinnest foam option available.
- Don’t overfill; leave room for milk to move and integrate.
- Polish (decant + swirl + tap), then pour immediately.
8) PSIIDAN 4-in-1 (B0GDXLFP6H) — Budget 4-in-1 with a detachable pitcher concept
PSIIDAN is another budget 4-in-1 option. In this category, your success with latte art depends less on brand name and more on workflow: wet/thin foam mode, correct fill level, and the polish step.

Best use case
- Budget buyers comparing 4-in-1 models: prioritize cleaning ease and the wettest foam option.
- Mixed drink styles: hot foam, cold foam, and warmed milk in one device.
- Flavor-first drinks: mochas and flavored lattes where perfect microfoam is less critical.
Latte art tip
If your foam is too dry, you will fight it. Choose thin foam, then polish until glossy. Pour right away.
9) Subminimal NanoFoamer (V2) — Manual microfoam that can actually pour
NanoFoamer is the “texture-first” option in this list. It’s not one-button — you heat milk separately — but it can produce genuinely pourable microfoam with the right technique. If your real goal is latte art texture rather than convenience, this is often the most efficient upgrade.
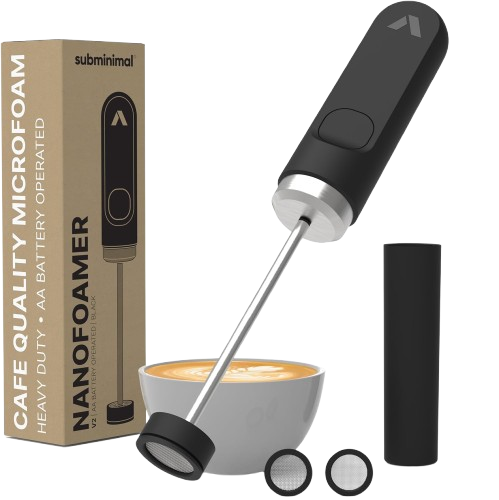
What it’s best at
- Pourable microfoam: excellent texture potential for latte art.
- Skill-based control: you decide how much air to incorporate.
- Works with any coffee base: espresso machine, moka pot, capsules — the foam workflow stays the same.
Simple “beginner microfoam” method
- Heat milk separately until hot but still touchable (avoid boiling).
- Start shallow for 3–5 seconds to introduce a small amount of air.
- Then go deeper to integrate until the milk looks glossy.
- Swirl, tap once, pour immediately.
Where it compromises
It requires two steps (heat + foam) and has a short learning curve. But for many home users, it’s the most direct path to better texture than most automatics can deliver.
Budget battle: SIMPLETASTE vs Rafow vs PSIIDAN
Keeping all budget options makes sense because buyers often compare within a tight price band. Here’s the practical way to choose: you are not buying “latte art guaranteed” — you are buying the easiest appliance to get wet foam from, then you do the polish step.
Pick SIMPLETASTE if…
- You want a straightforward entry model with the basics and no special requirements.
- You make both hot and iced drinks and want a simple routine.
Pick Rafow if…
- You mostly make one drink at a time and prefer a compact budget unit.
- You want a low-cost way to practice pouring and decide whether latte art is a real hobby for you.
Pick PSIIDAN if…
- You care most about day-to-day cleaning convenience and flexible modes.
- You make flavored drinks where perfect microfoam is less critical but consistency matters.
Troubleshooting: fast fixes for common home foam problems
- Foam won’t pour (too stiff): you used thick/cappuccino mode or over-aerated. Switch to thin foam and polish longer.
- Big bubbles: too much air + not enough integration. Start with colder milk, avoid max fill, swirl until glossy.
- Foam separates quickly: you waited too long. Polish and pour immediately.
- Art disappears: you poured too high during the drawing phase. Lower the spout to the surface once the cup is integrated.
- Tastes flat or burnt: milk overheated. Stop earlier; hot-but-touchable beats “as hot as possible.”
FAQ
Can you really do latte art with a milk frother?
Yes — especially hearts and tulips. Manual microfoam tools usually get closer to steam-wand texture. Automatics can work when you choose thin foam and polish before pouring.
What’s the easiest setup for beginners?
Any reliable espresso base, a frother that can make wet foam, and a small latte pitcher. Then practice the repeatable “decant + swirl + tap + pour” routine.
What milk works best for latte art at home?
Whole dairy milk is the most forgiving. For non-dairy, use barista oat blends and pour immediately after polishing.
Do budget frothers work with oat milk?
Often, but results vary. Use a barista oat blend, avoid thick foam modes, and pour immediately after polishing.
Why does my foam not pour?
It’s usually too dry or too aerated. Choose a latte/thin foam mode, don’t overfill, and swirl until the milk looks glossy and cohesive.
Is upgrading worth it?
If you make milk drinks daily, mid-range and premium units can be more consistent. If your goal is better latte art texture, a manual microfoam tool can be the most efficient upgrade.
Bottom line
Latte art at home is mostly about pourable texture + pour control. If you want the best chance without a steam wand, pick a microfoam-aligned option (DREO for automatic or NanoFoamer for manual), then do the polish step every time. If you’re budget shopping, choose the model that fits your serving size and cleaning preferences — and practice the same routine consistently.