Milk Steaming & Latte Art for Beginners: A Practical Step-by-Step Guide

The good news: latte art is mostly not “talent.” It’s repeatable milk texture plus a few pouring habits. If your milk looks like dry foam, or it separates into liquid + bubbles, the problem is almost always technique — not your machine. This guide gives you a simple steaming workflow that works on most home steam wands, then shows beginner pours (heart, tulip, rosetta) with a practice routine.
Quick Picks
Start with the fast answer, then use the jump links like a checklist while you practice.
-
Fast Answer: the quickest way to get microfoam
↓ Jump to Section -
Expert Sources: videos and trusted training resources
↓ Jump to Section -
Steaming Steps: stretch → vortex → finish
↓ Jump to Section -
Latte Art Basics: the 3 beginner pours that actually teach control
↓ Jump to Section -
Troubleshooting: fix bubbles, squeals, “foam cap,” and thin milk
↓ Jump to Section -
One Budget Tool: the pitcher size that makes beginners improve faster
↓ Jump to Section
Fast Answer: How to Steam Milk for Latte Art
If you want a single “do this every time” routine, use this:
- Use cold milk + a cold pitcher. Cold milk buys you time before it overheats.
- Fill the pitcher to the start of the spout. Too little milk makes it hard to form a stable vortex; too much milk makes it slow and messy.
- Purge the steam wand, then start steaming immediately. You want dry steam, not water spitting into the milk.
- Stretch early (first 3–6 seconds): keep the tip near the surface so you hear a gentle “paper tear” sound — that’s controlled air.
- Texture next: submerge slightly and create a whirlpool/vortex until the pitcher is too hot to hold comfortably (roughly 55–65°C / 130–150°F).
- Finish: tap the pitcher once, swirl hard until it looks glossy like wet paint, then pour right away.
The order matters: air first, vortex second. If you add air late, you get big bubbles and dry foam. If you never get a vortex, you get separation.
Expert Sources (Watch/Read)
- James Hoffmann — The Beginner’s Guide to Latte Art (from milk texture to simple pours).
- Lance Hedrick — The Ultimate Guide to Latte Art (world-class technique explained step by step).
- La Marzocco Home — How to Steam Milk (clear pitcher position and vortex explanation).
- Barista Hustle — Making Microfoam (the “two-part” model: aeration, then emulsification).
Before You Start: Milk, Pitcher, and Temperature
Most beginner problems are not about “powerful enough steam.” They come from using the wrong amount of milk, overheating it, or starting with milk that does not texture well. Fixing these basics makes a home machine feel much easier.
Milk choice (simple rules)
- Whole milk is easiest for microfoam because fat and proteins help stabilize foam and improve mouthfeel.
- Oat milk can work if it is “barista” style. Regular oat milk often separates quickly and looks watery.
- Skim milk foams fast but can feel “dry” and less glossy, which makes art harder even if the foam looks big.
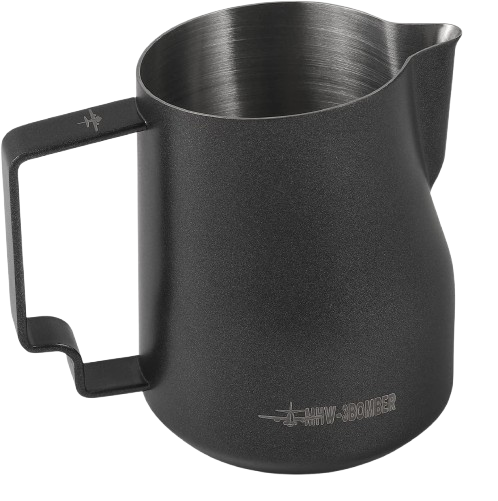
Pitcher size (the beginner secret)
The pitcher size should match your drink. A very large pitcher forces you to steam too much milk, which slows learning and makes pours inconsistent. For most home drinks, a 12oz (350ml) pitcher is the easiest tool for learning microfoam and basic art because the milk depth and vortex are more manageable.
Temperature targets (don’t overthink it)
You do not need a thermometer to start. Many baristas learn by touch: once the pitcher becomes too hot to keep your hand on comfortably, you are in the right range. Overheating (very hot milk) often tastes less sweet and becomes harder to pour smoothly.
Step-by-Step: Steaming Silky Microfoam
Think of steaming as two stages: stretch (add tiny amounts of air) and texture (mix that air into a glossy emulsion). The goal for latte art is not “lots of foam.” The goal is pourable microfoam.
1) Prep your machine and pitcher
- Fill cold milk to around the start of the spout (a consistent fill line matters).
- Purge the steam wand for 1–2 seconds to remove condensation.
- Position the steam tip just below the surface and slightly off-center in the pitcher.
2) Stretch (0–6 seconds)
Turn steam on fully. Keep the tip near the surface so you hear a controlled “tss-tss” or gentle ripping sound. This is air being pulled in. If it screams loudly, the tip is too close to the surface. If there is no sound, you are too deep and adding no air.
3) Texture (until hot)
Once the milk expands slightly and you have added your air, lower the tip a little deeper so the sound becomes smoother. Now your goal is a vortex — the milk should spin around, integrating the foam into the liquid. Keep the pitcher steady: most of the control is tip depth and angle, not aggressive stirring.
4) Finish the milk (this is where latte art is made)
- Stop steaming when the pitcher is hot to touch (roughly latte range).
- Wipe the wand and purge again to keep it clean.
- Tap and swirl: tap once to pop surface bubbles, then swirl hard until the milk becomes glossy and uniform.
- Pour immediately: microfoam changes quickly; waiting makes it separate and thickens the top layer.
Latte Art Basics: 3 Beginner Pours
Latte art is mostly about contrast and flow control. You create contrast by sinking the first part of the pour under the crema (mixing), then you bring the pitcher close to the surface to draw white foam on top.
The setup: cup angle, height, and speed
- Start high (pour from higher) and pour thinner to mix the milk under the crema.
- Finish low (pitcher close to the surface) to paint white foam on top.
- Control speed with your wrist, not your whole arm. Slow is usually cleaner for beginners.
1) Heart (best first pattern)
After you mix the base, move the spout close to the surface near the center. Pour a white circle, then lift slightly and “cut” through the middle to form a heart. If your heart disappears, your milk is too thin or you stayed too high (it mixed under the crema instead of sitting on top).
2) Tulip (stacking control)
A tulip is just several small “hearts” stacked. Keep the spout low, pour a small dot, shift slightly back, pour another dot, then cut through. Beginners improve fast with tulips because it forces repeatable milk thickness and steady flow.
3) Simple rosetta (wiggle + forward motion)
For a basic rosetta, you wiggle the pitcher gently while moving forward through the cup. Most failures happen when the milk is too foamy (dry) or the wiggle is too wide. Keep the wiggle small and consistent.
Troubleshooting: Fix the Common Beginner Problems
Big bubbles / “cappuccino foam” texture
- You added too much air or added air too late. Stretch only at the start (few seconds), then commit to the vortex stage.
- Swirl harder after steaming. If it looks like foam sitting on top, it isn’t integrated.
Loud screeching sound
- Tip is too close to the surface. Drop the tip slightly deeper until the sound softens.
- Start with a very small amount of air. Beginners often add far too much in the first second.
No vortex / milk just “boils”
- Move the tip slightly off-center and change the pitch of the wand angle until the milk starts spinning.
- Check milk volume. Too little milk makes vortex unstable; too much milk makes it hard to spin.
Foam cap forms quickly (separation)
- You didn’t texture long enough (no emulsification). Focus on vortex stage until the milk is glossy.
- Pour sooner. Even perfect milk separates if you wait too long.
Latte art “won’t show”
- You poured too high for too long. After the base mix, get the spout close to the surface to draw.
- Milk is too thin (not enough air) or too dry (too much air). The sweet spot is glossy “wet paint” texture.
A 15-Minute Practice Plan (Without Wasting a Bag of Beans)
You can improve fast with short, focused practice. The key is to practice the same thing repeatedly — not to try five patterns in one session.
- 5 minutes: steam microfoam only (focus on stretch timing + vortex).
- 5 minutes: pour only hearts (base mix high → draw low → cut through).
- 5 minutes: pour tulips (stack 2–4 dots, then cut through).
If you want to practice pours without espresso every time, a common approach is to use water with a tiny drop of dish soap to simulate how foam behaves. It won’t taste like coffee (obviously), but it helps you build pouring control and hand stability.
One Budget Tool That Helps Beginners: A 12oz Latte Art Pitcher
You can learn without buying anything, but one tool makes the learning curve noticeably easier: a correctly sized pitcher with a clean spout. A 12oz pitcher is easier to control for home lattes and reduces wasted milk during practice.
FAQ
Do I need a thermometer?
Not at the start. Learning to stop in a “sweet” temperature range by touch is enough for beginners. A thermometer can help consistency later, but it won’t fix poor stretching or lack of a vortex.
Why does my milk taste burnt?
Almost always overheating. Stop sooner, and prioritize the texture step (vortex) instead of “steaming longer.” Very hot milk loses sweetness and becomes harder to pour.
Can I do latte art with plant milk?
Yes, but choose “barista” versions and expect a narrower success window. The technique is similar, but plant milks can separate faster and may need slightly different stretching.
Bottom Line
Latte art starts with microfoam. Stretch early for a few seconds, then create a strong vortex to integrate the foam into glossy, pourable milk. Once your milk looks like wet paint, hearts and tulips become simple repetition — not mystery. If you want one practical upgrade, use a correctly sized pitcher and practice 15 minutes with one pattern at a time.